A clogged or faulty bathtub drain can be a hassle, preventing water from draining correctly after a bath or shower. Replacing the drain is often the best solution for resolving drainage problems and restoring full functionality to your tub.
While it may seem daunting, replacing a bathtub drain is a manageable project for a home DIYer with some basic plumbing knowledge. In this guide, I’ll walk you through the process in 9 easy steps. Follow along to learn how to remove your old drain, select the correct replacement, install new plumbing fixtures, and repair your bathtub drainage.
Step 1: Turn Off the Water Supply and Drain the Tub
Before removing the old drain, turn off the water supply to the tub and drain any standing water. This prevents water from spurting out when you unscrew plumbing fittings.
Locate the shut-off valves that control water flow to the tub spout and showerhead. Turn the handles clockwise to shut off the water. To be safe, briefly turn on the tub faucet to release any pressure in the pipes.
Next, lay towels around the tub’s rim and use a cup or turkey baster to remove all standing water in the bottom. Sponge up any remaining puddles so the tub is completely dry. Now, if you’re tackling a bathtub drain removal, it’s safe to start removing the old drain mechanics without making a splash.
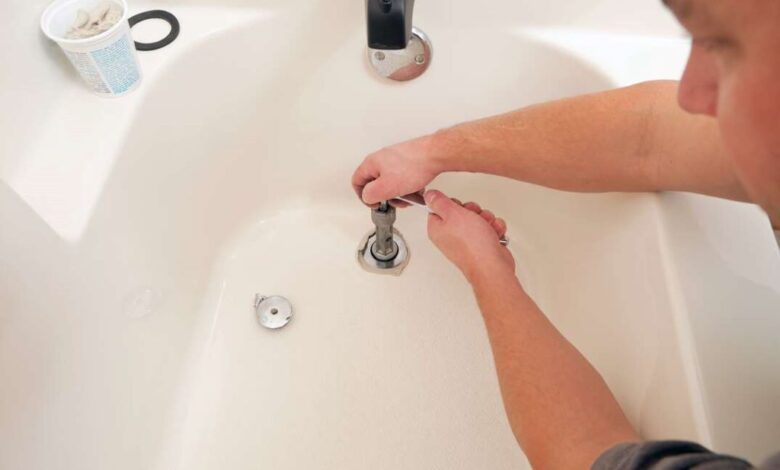
Step 2: Remove the Drain Trip Lever or Stopper
The first component to remove is the visible drain trip lever or stopper mechanism. This lets you access the drain tailpiece from inside the tub.
For a toe-touch drain, pry off the drain cover cap with a small flathead screwdriver to access the retaining nut below it. Use a wrench or pliers to loosen the nut and detach the linkage.
Look for a small set screw on the side for a flip-style trip lever and unscrew it with a hex wrench. The lever will then slide right off the assembly.
For a suction-style stopper, unthread it from the drain crossbar by hand. Pull up, and it will detach from the opening.
With any drain style, keep all parts together so you can reinstall them later on the new drain hardware.
Step 3: Unscrew the Drain Tailpiece from Tub
The curved metal drain tailpiece attaches to the waste pipe running to the home’s plumbing system. Use a wrench or pliers to unscrew this counterclockwise.
The tailpiece may be sealed to the drain hole with putty on older tubs. If it won’t budge, use a heat gun or hair dryer to warm the putty and loosen the seal. Keep turning until the tailpiece separates.
Be prepared for some water to dribble out of the opening as you detach the tailpiece. Have towels ready below.
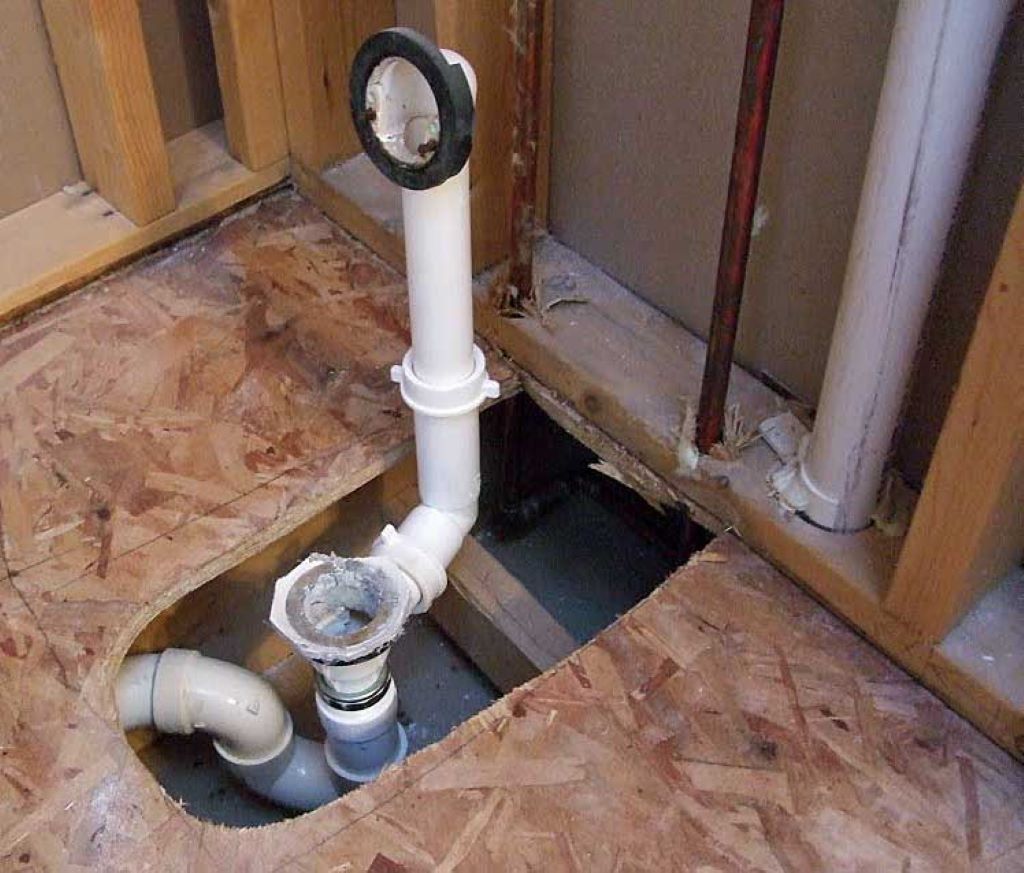
Step 4: Remove Old Plumbing from Below Tub
Now it’s time to get under the tub and detach the drain pipes. Start by placing a bucket below the area to catch any draining water.
Loosen the slip-nut connecting the curved tailpiece to the stub-out drain pipe in the wall using pliers or your hands. As you unscrew the nut, the tailpiece will detach and allow you to pull the stub-out out from the tub overflow opening.
Next, unscrew the threaded drain pipe from the waste line in the wall using a pipe wrench. You may need to hold back the elbow joint above it with tongue-and-groove pliers as you turn the drain pipe counterclockwise.
With the old drain pipes detached, you can now start installing the new replacement drain.
Step 5: Attach New Drain Tailpiece and Overflow Elbow
First, apply the plumber’s putty around the underside of the new drain tailpiece. Insert it up through the tub drain hole from below and tighten it clockwise to seal it in place.
Then, take the new overflow elbow pipe and attach one end to the stub-out port on the tailpiece. Tighten the slip-nut by hand or with pliers to secure the connection.
Ensure the elbow’s open end is aimed toward the waste line you disconnected the old drain from.
Step 6: Fasten the New Drain Pipe to the Waste Line
Now, you can attach the new drain pipe that carries water down to the waste line in the wall.
Apply the plumber’s putty or pipe joint compound to the threads on one end of the drain pipe. Screw it clockwise into the bottom of the elbow overflow you just installed. Use tongue-and-groove pliers to steady the elbow as you turn the drain pipe with a wrench.
Next, screw the bottom of the drain pipe into the waste line opening, making a tight sealed connection. Congrats, you’ve just completed the below-tub drain installation.
Step 7: Attach the New Drain Trip Mechanism from Above
The final plumbing step is to attach the new bathtub drain trip assembly inside the tub.
Drop the new lift rod down through the overflow opening for a toe-touch drain. Then screw the tailpiece end onto the drain pipe threads from under the tub.
For a trip lever, slide the new lever through the overflow hole and secure it with the set screw. Attach the linkage below to the tailpiece.
For a suction-style stopper, thread it onto the pivot rod emerging from the drain opening.
Adjust the linkage and confirm the assembly raises and lowers appropriately when operated with all styles. Add putty if any connections leak.
Step 8: Seal Plumbing Joints and Reinstall Access Panel
Before finishing up, add plumber’s putty, pipe joint compound, or Teflon tape anywhere drain pipes meet to prevent leaks. Tighten any joints as needed.
Reattach any access panels below the tub that you had to remove. Screw them back into place to protect the drain plumbing.
Now, you can turn your water supply back on and test for leaks!
Step 9: Caulk Around the New Drain & Test
The last step is to caulk around the new drain where it meets the tub surface. This prevents water from seeping down and causing stains or mildew.
Squeeze a bead of tub and tile caulk around the drain tailpiece and stopper body (if applicable). Smooth with a finger before it dries.
Turn on the tub faucet and check your work. Make sure no water leaks out around the new drain seal. Also, fill the tub and test the drain trip lever to confirm it opens the drain and allows water to empty with no issues.
That concludes the bathtub drain replacement process from start to finish. With some simple tools and plumbing parts, you can tackle this project yourself and renew your tub’s drainage. You will no longer be standing in dirty gray water by the time you’ve toweled off!
Frequently Asked Questions
Q: Can I replace the bathtub stopper rather than the entire drain?
A: In some cases, you may be able to unscrew an old stopper assembly and install a new one rather than replace the entire drain. This can resolve issues with a leaky gasket or broken trip lever. However, a full replacement is recommended if the tailpiece or complete drain is corrupted or damaged.
Q: How do I measure my bathtub drain size?
A: Standard tubs have a 1 1/2″ or 1 1/4″ drain opening. Measure across the opening with a tape measure or gauge piece to determine the diameter. Also, note if you have a brass or plastic drain before purchasing a new one.
Q: What tools do I need to remove the old tub drain?
A: Handheld tools like adjustable pliers, tongue-and-groove pliers, a wrench, screwdriver, and hex wrench are needed to detach all the old drain components and hardware. You may also need a pipe wrench and heat gun for stuck plumbing joints.
Q: What is the stub-out pipe for?
A: The stub-out pipe from the tub overflow hole connects to the curved tailpiece that travels down to the bath waste line. The stub-out aims to waste water outward and down.
Q: How can I stop my new bathtub drain from leaking?
A: Check that all slip-nut connections are appropriately tightened without pipes cracking. Use plumber’s putty or pipe joint compound at connections. Adjust or tighten the drain trip lever linkage as needed. If leaks persist, disassemble and reseal all joints.
Conclusion
Replacing a worn or defective bathtub drain is one of the handiest projects a DIYer can take on. With some attentive plumbing work, water flows freely down the drain again. Just turn off the water and drain supplies, carefully remove old hardware, and install new pieces step-by-step. Follow the steps here, and you’ll prevent future clogs while restoring easy drainage to your tub.
While a bathtub drain replacement may seem intimidating initially, mastering the art of how to remove a tub drain is a crucial step in the process. Take it one section at a time for a stress-free and satisfying DIY experience. The key steps include detaching the visible stopper mechanism, unscrewing the tailpiece, disconnecting old drain pipes, installing new pipes and seals, attaching the new trip lever, and testing for leaks. Equipped with some basic DIY skills and plumbing tools, you can tackle this project and avoid the hassle and cost of calling a plumber.