
Installing a door frame may initially seem intimidating, but it can be a straightforward DIY project with the right tools and techniques. Properly installing a door frame is crucial for functionality, security, and aesthetic appeal. This comprehensive guide will walk you through each step of the door frame installation process, from preparing the rough opening to hanging the actual door. Follow along to learn the ins and outs of installing a door frame like a pro.
Gather the Necessary Materials
Before getting started, you’ll need to gather the required materials. Having all your supplies in order ahead of time will make the installation process smoother. If you’re dealing with a crack above the door frame, addressing this issue is essential before proceeding. Scrutinize the area to determine the extent of the damage, and consider including any additional materials needed for crack repair in your preparations. This proactive approach ensures that your installation enhances the overall look and addresses structural concerns about the crack above the door frame.
The Door Frame
You’ll need a new door frame. When selecting a frame, consider the style and size you need for the doorway. Will it be a basic rectangular wood frame or a more ornate metal frame? Measure the rough opening carefully to ensure a proper fit. It’s better to have a tight fit and trim the frame than a loose one.
Tools
You’ll need standard DIY tools like:
- Tape measure
- Level
- Stud finder
- Drill and drill bits
- Hammer
- Pry bar
- Utility knife
- Safety glasses and gloves
For fastening the frame, have wood or metal shims, silicone sealant, screws, and nails on hand. Ensure you have all the tools for your specific frame material and rough opening.
Other Supplies
- Drop cloths – protect floors and surfaces
- Rags – for cleaning up messes
- Sandpaper – to smooth rough edges
Gather all these preparation materials before touching the rough opening. Careful planning makes frame installation much more straightforward.
Prepare the Rough Opening
The rough opening is where the old door and frame will be removed and the new one installed. Preparing the opening properly will ensure the frame fits right and functions well.
Remove the Existing Door and Frame

Carefully detach the door from the old frame and set it aside if you plan to reuse it. Then, use a pry bar and hammer to remove molding and pull out nails to detach the frame. Go slowly to avoid damaging the surrounding wall.
Once detached, remove old nails and screws from the rough opening with pliers. Scrap any old caulk or debris with a putty knife so the new frame can lie flush.
Check the Dimensions
Verify the measurements of the rough opening. It should be 1⁄2 to 3⁄4 inches larger than your new frame. You’ll have to widen it by removing more drywall if it’s too small. It is too large, and the frame may be unstable.
Make Any Repairs
Inspect the studs and sill plate for damage. Replace damaged sections and use filler to patch holes or dents. The opening should be perfectly plumb and square for proper frame installation.
Prepare the Floor
Make sure the floor under the doorway is level. An uneven floor will throw off the entire alignment of the frame. Use shims if necessary to stabilize the sill plate for the new frame.
Preparing a smooth and sturdy rough opening lays the groundwork for frame installation success.
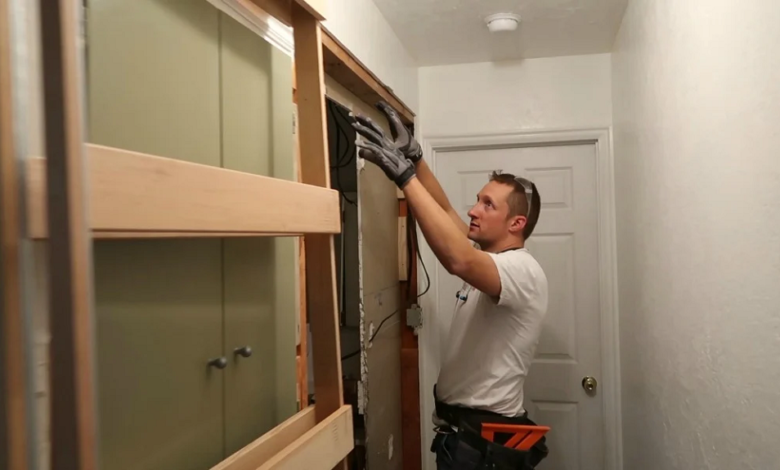
Install the new doorframe.
With your rough opening ready, it’s time to install the new door frame. This part of the process takes precision, patience, and care.
Run a Bead of Caulk
Outlining the rough opening with silicone caulk helps create a tight seal between the frame and the wall. This minimizes drafts while providing stability. Don’t caulk the threshold under where the door will swing yet.
Set and Shim the Frame
Carefully place the frame into the opening. Have help to hold it steady if needed. Use shims to adjust it until the frame is perfectly plumb and level. Place shims behind each hinge location and near the strike plate area.
Fasten the Frame
With the frame aligned properly, attach it securely to the rough opening. Use the appropriate fasteners for your frame material. For wood, nail through the jambs into the studs and sill plate. For metal, use screws.
Drive fasteners into each shimmed area, spacing them every 12-16 inches. Don’t over-tighten, as expansion and contraction can shift the frame slightly.
Insulate Voids
Check for any gaps between the framed edges and rough opening. Fill these voids with fiberglass insulation to improve energy efficiency and soundproofing.
Caulk Seams and Gaps
Run a smooth, consistent bead of caulk along the interior and exterior seam between the frame edges and wall. Also, caulk along the threshold at the base. This finishes off the frame installation cleanly.
Take it slowly here for the best results. Rushing can lead to a crooked, dysfunctional frame. Patience pays off.
Hang and Adjust the Door
Once the frame is securely placed, hanging the door and fine-tuning the fit is time.
Install Door Hinges
Attach hinges to the door first, screwing them into the pre-drilled holes. Then set the door into the frame and screw the hinge plates directly to the jamb. For proper functionality, use shims under the hinges to make minor adjustments if needed.
Install Door Latch and Strike Plate

Carefully measure and mark where to drill holes for the lockset and handle. After drilling, mount the lock hardware according to the manufacturer’s instructions.
Then, align the strike plate on the frame so the latch inserts correctly. Fasten with screws.
Test Operation and Adjust
Open and close the door to test the operation. Adjust shims behind hinges to realign the door if there are any sticking points or rubs. You may also have to deepen the strike plate mortise so the latch fits smoothly.
Install Door Stops
Measure where the door should stop when fully opened and closed. Screw door stops to the frame at these points to prevent damage to surrounding walls.
Finish off Details
Install the door knob, Weatherstripping, and trim molding for a complete finish—Caulk around any remaining gaps with silicone sealant.
It takes care of the door installation and adjustments, resulting in a smooth operation that should last for years.
Tips for Success
Installing a door frame on your own may seem daunting, but these pro tips will help you achieve success:
- Read the manufacturer’s instructions thoroughly before beginning.
- Watch online tutorial videos for visual guidance.
- Have an assistant provide extra hands when lifting and aligning the frame.
- Use a miter, circular, or jig saw to carefully trim frames or widen rough openings.
- Work slowly when fastening the frame to ensure proper alignment.
- Shim strategically behind hinges and the strike plate area for stability.
- Check for level and plumb often as you work using a level and tape measure.
- Use a drill with a nut driver bit for quick hinge and hardware installation.
- Adjust shims and hinge placement incrementally to hang the door straight.
- Fill gaps with silicone caulk and spray foam for a draft-free seal.
- Label doors and hardware as you remove them to simplify rehanging.
Following these tips will lead to professional-looking results when installing your door frame.
FAQs
What kind of fasteners should I use?
For wood frames, 2 to 3-inch galvanized finish nails are ideal—pre-drill holes to prevent splitting. For metal frames, 1 to 1-1/2 inch self-tapping screws provide the best attachment.
What is the best way to remove an old frame?
Use a pry bar and hammer to carefully pull out the nails and molding holding the frame. Go slowly to avoid damaging the surrounding wall.
Should I insulate around the new frame?
Yes, adding fiberglass insulation around the shimmed areas improves energy efficiency. Mineral wool or spray foam also works well.
How much gap should be between the frame and the rough opening?
Leave a gap of 1/4 to 1/2 inches between the frame and rough opening edges to allow for shims and caulk.
What kind of caulk is best?
For durability and flexibility, use a high-quality silicone sealant rated for indoor and outdoor use.
Carefully following installation steps and using proper materials will result in a solid, functional door frame that lasts.