A leaking bathtub faucet can be one of the most annoying and frustrating plumbing issues you encounter in your home. Not only is it a waste of water and money on your utility bills, but that constant drip-drip-drip sound can drive you crazy. The good news is that a leaking double handle tub faucet is often an easy DIY fix. With some basic tools and plumbing knowledge, you can have your tub faucet working like new again in no time.
In this comprehensive guide, I’ll walk you through the entire process of diagnosing and repairing a leaky double handle tub faucet.
Common Causes of a Leaking Bathtub Faucet
Before you can fix a leaky tub faucet, it helps to understand what causes them in the first place. Here are some of the most common reasons double handle tub faucets leak:
Worn Out Rubber Washers
Inside each faucet handle is a rubber washer that helps seal the valve when you turn the handle off. Over time, these washers flatten and degrade, eventually allowing water to seep through even in the “off” position. Replacing old rubber washers is one of the easiest and most effective ways to stop many tub faucet leaks.
Damaged or Worn Out O-Rings
O-rings play a crucial role in establishing a watertight seal at various connection points within the faucet body and around its exterior. Explore how to replace a two handle bathtub faucet to ensure the continued functionality of these seals. Cracks or tears in these O-rings can lead to leaks, much like washers.
Over time, O-rings tend to weaken and dry out, necessitating replacement to maintain the faucet’s efficiency and prevent potential water damage. Regular maintenance and timely replacement of these components contribute to the overall longevity and performance of your two-handle bathtub faucet.
Mineral Build-Up and Corrosion
Hard water contains minerals like calcium and magnesium that can leave deposits inside your faucet. These deposits can eat away at washers and O-rings. Also, metal components like valve seats can corrode over the years, ruining the smooth seal surfaces. Scrubbing away build-up and corrosion is key.
Loose or Damaged Interior Parts
The jostling of repeated handle turning can loosen interior parts inside a faucet over time. Screws can come undone, valve seats can shift slightly out of position, and plastic or brass components can crack. Identifying and tightening or replacing loose or damaged pieces is required to stop leaks.
Frozen Pipes
In very cold weather, the water inside pipes leading to your tub faucet can freeze, usually near a wall where temperatures dip. The pressure of expanding ice can damage faucet components, causing leaks. Thawing and inspecting for cracks or splits in tub hardware will likely be needed after freezing takes place.
Now that you know what causes leaky tub faucets, let’s go over the tools, supplies, and steps for fixing them.
Tools and Supplies You’ll Need
Fixing a leaky double handle tub faucet requires just a few basic tools and supplies, which you may already have on hand:
- Adjustable wrenches – 2 medium-sized wrenches are ideal, one to hold parts steady and the other to loosen and tighten nuts and bolts.
- Replacement seals/washers – Most hardware stores sell universal faucet repair kits with an assortment of common rubber washers, O-rings, gaskets, and valve seals. Buy a variety pack.
- Screwdriver – Standard flat or Phillips head type to remove handle retaining screws.
- Plumber’s grease – Used to lubricate washers and O-rings for smooth handle turning. Any mineral-based grease will do.
- Vinegar or lime remover – Helpful for soaking away mineral deposits that may interfere with proper sealing.
- Flashlight – For peeking inside the faucet pipes and valves once you remove outside hardware.
- Cloth rags – For gripping slippery faucet parts. Paper towels also work.
- Bucket – For catching excess water drips as you work.
- Safety goggles – For eye protection.
With your supplies gathered, you’re ready to start the repair process. But first, you need to shut off the water.
Shutting Off the Main or Individual Water Supply Valves
Before tackling any faucet repair, it’s crucial to shut off the water leading to the tub. There are two ways to do this:
Option 1 – Turn Off Main Water Supply: The main supply line brings water into your home from the street. There should be a shut-off valve on this line coming in from the wall somewhere (often in the basement, crawlspace, or garage). Turning this valve clockwise until tight will shut off water to the entire house so you can safely work on the tub faucet.
Option 2 – Turn Off Individual Valves: Under the sink or near the tub, you may find smaller individual shut-off valves specifically for the hot and cold faucet lines. You can turn these off to isolate just the tub fixture. However, old valves may be stiff or leaky themselves, in which case shutting the main line is better.
Either option works. Just be sure all water supply is OFF before taking anything apart. Open the tub faucet after shutting off the water to relieve any remaining pressure and drain the pipes fully. Now you’re ready to dig in and find the leak!
Disassembling the Double Handle Faucet
With the water off, it’s time to take the faucet apart piece by piece to access the interior. Turning off the water first minimizes the mess at this stage. Here are the general steps for disassembly:
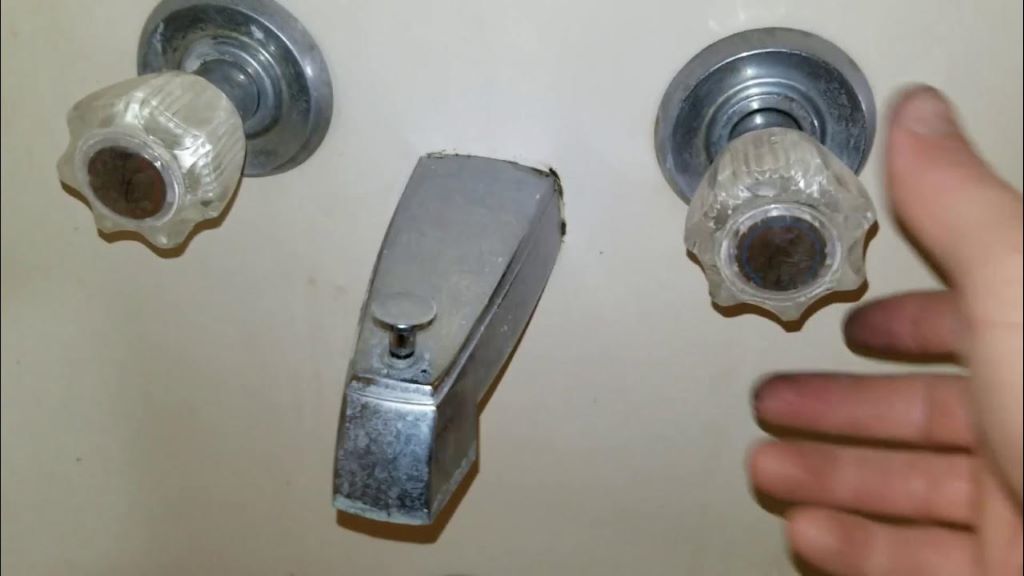
Remove the Faucet Handles and Domes
The handles and decorative domes on top unscrew easily counterclockwise. Some may have a small set screw near the base that needs loosening with a screwdriver before they’ll turn. Removing the handles provides access to the interior valve stems, washers, etc.
Detach the Handle Bodies or Escutcheons
The base flanges where the handles attach also twist or pry off with a little elbow grease. Some have small snap clamps that need releasing with a screwdriver. Taking off the handle bodies exposes even more of the valve interiors.
Remove Nuts Holding the Valve Stems
Inside at the base of each valve, you’ll see a retaining nut holding the valve stem in place. Use an adjustable wrench to loosen and unscrew these nuts so the valves will come free. Have a rag handy to absorb drips.
Pull Out the Valve Stems and Components
Once you remove the nuts, the valves and stems should pull straight up and out, providing full access to the interior of the faucet. Examine all the washers, seals, springs, and plastic and metal pieces as you go and set them aside.
By methodically disassembling the faucet handles, domes, escutcheons, nuts, and valves, you’ll eventually reach the source of the leak. Now comes the fun part – figuring out exactly where it’s coming from!
Identifying the Exact Leak Source
With the faucet fully disassembled, it’s inspection time. Examine each rubber washer and O-ring closely for cracks, scrapes, and uneven wear. Scrutinize the metal valve seats and stems for signs of corrosion or mineral deposits. Wiggle interior parts to see if anything is loose.
If you’re still unsure of the leak location, reassemble just the interior valve components and turn on the water briefly to see where drips emerge. This will pinpoint the problem area.
Some of the most common tub faucet leak spots include:
- Worn rubber washers around the valve stems.
- Tears or cracks in the circular O-ring near the base of the valve body.
- Leaking O-rings around the exterior of the valve seats.
- Eroded plastic or corroded metal valve seats not sealing properly.
- Mineral deposits inside the faucet preventing proper seal contact.
Once you’ve identified the leaking component, it’s time for replacement.
Replacing Faulty O-Rings and Seals
The repair for most tub faucet leaks involves replacing one or more worn rubber seals or O-rings. Use your leaky part as a guide for selecting the appropriate replacement from your faucet repair kit. Key steps include:
Clean Away Mineral Build-Up
If you found excessive mineral deposits or corrosion on any mating seal surfaces, carefully scrape and scrub away this debris so the new seals can form a tight fit. Vinegar or lime remover helps dissolve build-up.
Lubricate the New O-Rings
Lightly coat your fresh O-rings and washers with a dot of plumber’s grease before installation. This ensures a smooth tight fit and helps them slide on easily.
Firmly Press Seals Into Place
Whether pushing a new O-ring onto a valve seat or inserting washers into the faucet body, take care to fully press the seals into their grooves so they are completely flat and snug. Proper seating prevents future leakage.
And that’s the basic gist of the seal replacement process! Once your new parts are installed, it’s time to put the faucet back together.
Reassembling and Reinstalling the Bathtub Faucet
Reassembly is basically the reverse of taking the faucet apart. Follow these tips for ensuring proper operation:
Hand Tighten Parts Initially
When putting interior components like valves and stems back into the faucet body, only finger tighten retaining nuts at first. This allows small alignment adjustments to prevent cross-threading.
Wrench Tighten Nuts
Once everything seems aligned, go back with your wrench and tighten the interior nuts snugly (but don’t over-crank them!). Then reinstall the domes and handles tightly by hand.
Check Handle Operation
Turn both handles back and forth to make sure they rotate smoothly through the full range without sticking or rubbing. The valves should open and close properly. If not, realign parts as needed until operation is smooth.
Test for Leaks!
The big moment of truth – turn the main water back on and check your work! Turn both handles on and off and look closely for drips. If all is dry, congratulations on successfully fixing the leak!
Restoring Water Supply and Testing for Leaks
As a final step once the tub faucet is reassembled, turn the water supply back on and verify that your repair was successful. Follow these tips:
Remove All Parts and Tools
Before turning water back on, make sure small parts or tools aren’t still under the sink or tub. Debris getting into the lines can cause problems later.
Turn Water on Slowly
Crack the main or individual shut-off valves open slowly at first. This prevents a sudden water hammer effect in the pipes as pressure is restored.
Check Hot and Cold Sides
Test both hot and cold handles independently while looking closely for drips from the spout or leaking under the handle base. No drips means success!
Check for Secure Fit
Wiggle the handles around to make sure they feel snugly reattached with no play or looseness. This confirms your repair will hold tight.
By turning the water on gradually and double checking for leaks near newly tightened seals, you can confirm that your DIY faucet fix was a success!
FAQs
Should I fully shut off the water or just the individual tub valves?
For safety and ease of repair, it’s best to fully shut off water to the entire home at the main line when fixing a tub faucet. The main valve gives you a reliable, leak-free shut-off.
What do I do if the handles are stuck and won’t come off?
Penetrating oil around the base of stuck handles combined with gentle prying with adjustable pliers will free most stuck faucet parts. Avoid excessive force which could damage the faucet.
Why do I need to replace washers and O-rings?
Rubber seals wear out over years of use, resulting in drips even when the valves are closed completely. Fresh seals restore the watertight fit needed to stop leaks.
How can I remove stubborn mineral deposits?
For heavy lime and corrosion, soak affected parts in undiluted white vinegar for several hours, then scrub away deposits with an old toothbrush. Be patient but gentle.
What type of grease should I use on O-rings?
Any basic mineral-based plumber’s grease is perfect for lubricating faucet O-rings and washers. Avoid petroleum-based greases which can damage rubber. A small tube goes a long way.
Is it worthwhile to replace the entire faucet rather than fix it?
If your double handle tub faucet is over 15 years old and leaks persist even after repairs, a full faucet replacement may be worthwhile. Otherwise fixing worn parts often does the trick.
When should I call for professional help with my tub faucet?
If you can’t find the shut-off valves, if interior parts are badly corroded or cracked, or if repeated DIY efforts fail to stop leaks, it may be time to call a plumber to inspect and service the faucet thoroughly.
Conclusion
I hope this comprehensive overview takes the mystery and frustration out of fixing a leaky double handle tub faucet yourself. While any faucet repair takes a little time and patience, the basic process involves: shutting off water, disassembling the faucet, identifying worn washers or O-rings, replacing these seals, reassembling, and testing for successful leak repair.
With the right tools and plumbing components on hand, a methodical approach, and the determination to tackle basic home repairs yourself, such as fixing a leaky shower faucet single handle, you can avoid the hassle and cost of a plumber visit for many common bath faucet leak issues. So grab your wrenches and get your DIY learning on! You’ve got this.