

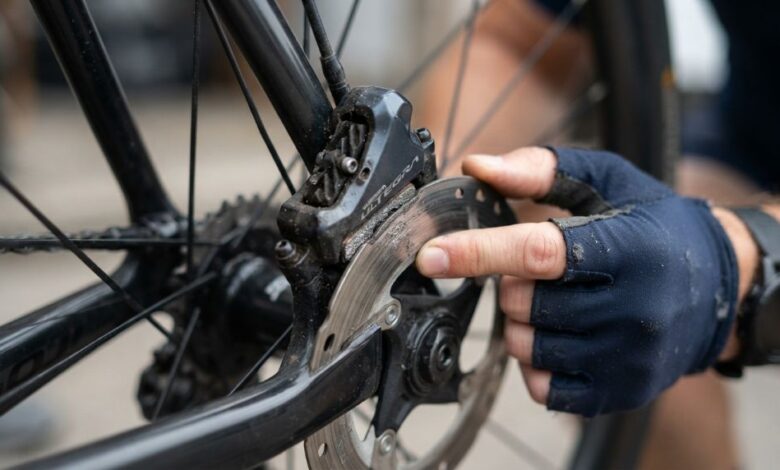
Few things are more annoying than hearing a loud squeal every time you squeeze your bike brakes. The sound can make a peaceful ride unpleasant. More importantly, it can sometimes point to a brake problem that needs attention.
Fortunately, brake squeal does not always mean your brakes are failing. Several simple problems can create this noise. Dirty brake pads, contaminated rotors, poor alignment, and worn parts are common causes.
The good news is that most riders can check these issues at home. You only need a few basic tools and some patience. However, brake work requires care because your brakes are critical safety parts.
Before making adjustments, inspect the entire braking system. Look for dirt, oil, uneven pad wear, loose bolts, or damaged components. Also, test the brakes at low speed after completing any repair.
This guide explains how to fix bike brake squeal step by step. It covers both rim brakes and disc brakes. You will also learn when cleaning works and when replacement makes more sense.
Why Do Bike Brakes Squeal?
Brake squeal happens when brake parts vibrate during braking. The vibration can occur between the brake pad and braking surface. It can also involve the brake caliper, rotor, rim, or mounting hardware.
Moisture and dirt often make the problem worse. Oil or other contaminants can also change how the braking surfaces behave.
Rim brakes can develop squeal when the pads contact the rim incorrectly. The pads may need alignment rather than replacement. This issue often occurs when the pads sit completely flat against the rim.
Disc brakes have different causes. Contaminated pads and rotors are common problems. A rotor can also become slightly misaligned. As a result, the brake pad may contact the rotor unevenly.
Some brake noise is normal under certain conditions. Wet weather can temporarily make brakes louder. However, persistent squealing deserves inspection.
Start by identifying the type of brake on your bicycle.
- Rim brakes use pads that press against the wheel rim.
- Disc brakes use pads that grip a metal rotor.
- Hydraulic disc brakes use fluid to move the brake pistons.
- Mechanical disc brakes use a cable to move the caliper.
Once you know your brake type, troubleshooting becomes easier.
Never spray oil, lubricant, or general-purpose cleaner onto braking surfaces. These products can reduce braking performance significantly.
If you recently lubricated your bicycle chain, check whether oil reached the brakes. Even a small amount can cause problems.
Therefore, finding the source of contamination should be your first step.
How to Fix Squealing Rim Brakes
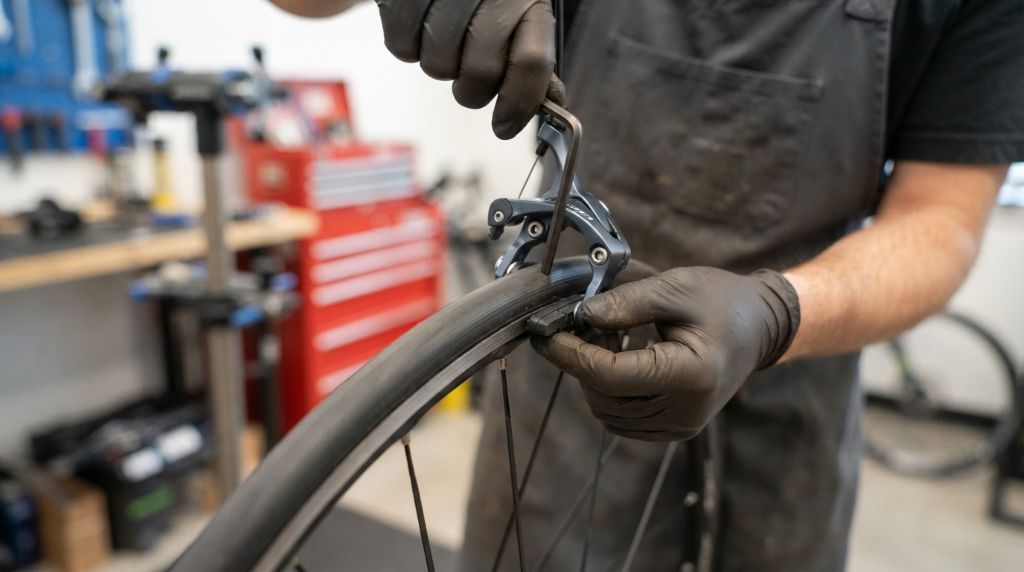
Rim brakes often squeal because of poor pad alignment. The brake pad should contact the rim correctly during braking.
One useful adjustment is called toe-in. With toe-in, the front edge of the brake pad contacts the rim slightly before the rear edge.
This setup can reduce vibration during braking. However, the adjustment should remain small. Excessive toe-in can create uneven braking and faster pad wear.
First, inspect both brake pads carefully. Look for cracks, deep grooves, embedded metal, or heavy wear. Replace badly worn pads rather than trying to repair them.
Next, clean the rim. Use a clean cloth and an appropriate bike-safe cleaning method. Remove dirt and oily residue from the braking surface.
Avoid touching the cleaned rim with greasy fingers. Your hands can transfer oil back onto the braking surface.
Then check whether the wheel sits correctly in the frame. A poorly seated wheel can affect brake alignment.
After that, inspect the brake arms and mounting hardware. Loose parts can allow unwanted movement during braking.
For many rim brakes, this basic process helps:
- Remove visible dirt from the brake pads.
- Clean the wheel rim thoroughly.
- Check the pads for excessive wear.
- Adjust the pad position.
- Add slight toe-in if appropriate.
- Tighten the brake hardware.
- Test the brakes at low speed.
Do not sand brake pads aggressively. Removing too much material can affect their shape and braking performance.
Also inspect the rim for damage. A badly worn or damaged rim can create braking problems that adjustment cannot solve.
After making changes, test the bike somewhere safe. Avoid traffic until you know the brakes work properly.
How to Fix Squealing Disc Brakes
Disc brake squeal can be more stubborn. Contamination is one of the most common reasons for persistent noise.
Start by inspecting the rotor. Look for oil, grease, dirt, or unusual discoloration. A dirty rotor can cause poor braking and unwanted noise.
Clean the rotor with a suitable bicycle disc-brake cleaner or isopropyl alcohol. Use a clean, lint-free cloth. Avoid touching the braking surface afterward.
Next, inspect the brake pads. Remove them according to your brake manufacturer’s instructions. Check for oil, deep grooves, glazing, or uneven wear.
Contaminated pads often need replacement. Cleaning a heavily contaminated pad may not restore proper braking.
Glazing can also cause noise. It happens when the pad surface becomes unusually smooth or hardened. However, the correct solution depends on the pad material and condition.
Rotor alignment also matters. A bent rotor can rub against the pads while the wheel rotates. You may hear periodic rubbing rather than a single squeal.
Spin the wheel slowly and watch the rotor through the caliper. If the rotor moves sideways, it may need careful straightening or replacement.
Caliper alignment deserves attention too. The caliper should sit correctly over the rotor.
A practical inspection includes:
- Clean the rotor.
- Inspect the brake pads.
- Replace contaminated pads when necessary.
- Check rotor alignment.
- Check caliper alignment.
- Inspect bolts for proper tightness.
- Bed in new pads correctly.
Avoid using household degreasers on brake components. Some products can leave residues that affect braking.
If cleaning does not solve the problem, consider replacing the pads. Persistent contamination often makes replacement the safer choice.
How to Bed In New Brake Pads
New disc brake pads often need a proper break-in process. This process is commonly called bedding in.
Bedding allows the pad material to develop an even contact surface with the rotor. It can improve braking feel and reduce unwanted noise.
The exact procedure depends on the brake manufacturer. Therefore, follow the instructions supplied with your brakes whenever possible.
A common approach involves controlled stops on a safe, flat road. Gradually apply the brakes without locking the wheels.
Repeat several moderate stops. Allow the brakes to cool between harder braking periods.
Do not hold the brakes continuously during the entire process. Excessive heat can affect brake performance.
A simple process may look like this:
- Find a quiet, safe area.
- Accelerate to a moderate speed.
- Apply one brake firmly.
- Slow down without completely stopping.
- Release the brake and allow it to cool.
- Repeat several times.
- Alternate between the front and rear brakes.
Avoid aggressive braking during the first few stops. Gradual braking helps create an even pad and rotor surface.
Some manufacturers recommend a specific number of braking cycles. Therefore, the manufacturer’s instructions should take priority over generic advice.
You may notice the brake becoming stronger during the process. The sound may also change as the surfaces mate.
However, bedding will not fix severely contaminated pads. It also will not repair a damaged rotor or badly aligned caliper.
Therefore, identify the underlying problem before attempting bedding.
How to Prevent Bike Brake Squeal
Preventing brake squeal is easier than repeatedly fixing it. Regular cleaning and inspection can catch small problems early.
Keep your braking surfaces free from oil and grease. When lubricating your chain, apply lubricant carefully. Avoid spraying products near the wheels or brakes.
Clean your bike after riding through mud or heavy rain. Dirt can collect around brake components and increase wear.
Check brake pads regularly. Look for uneven wear, cracks, or excessive thinning. Replace them before they become unsafe.
For disc brakes, inspect the rotor occasionally. Look for heavy scoring, unusual discoloration, or visible damage.
For rim brakes, inspect the wheel’s braking surface. Excessive rim wear can become a serious safety concern.
Also check brake cables on mechanical systems. Frayed or damaged cables can affect brake control. Replace damaged cables rather than trying to repair individual strands.
Hydraulic brakes need different maintenance. If the lever feels unusually soft, the system may require professional inspection or bleeding.
According to the U.S. Consumer Product Safety Commission, bicycle riders should regularly inspect their bicycles and maintain critical components. The agency also emphasizes proper bicycle maintenance for safer riding.
A simple maintenance routine can include:
- Inspect brakes before longer rides.
- Clean braking surfaces regularly.
- Check pad wear.
- Check rotor or rim condition.
- Look for loose brake hardware.
- Replace damaged components promptly.
Good maintenance does more than reduce squealing. It helps keep braking predictable when you need it most.
When Should You Replace Brake Pads or Get Help?
Cleaning and adjustment can solve many squealing problems. However, some situations require replacement or professional service.
Replace brake pads when they become excessively worn. Also replace them when they remain contaminated after proper cleaning.
Do not continue riding if your brakes feel weak or unpredictable. Squealing alone may be harmless. Squealing combined with poor braking deserves immediate attention.
Hydraulic brakes require additional caution. A leaking system can reduce braking power. Air in the hydraulic system can also make the brake lever feel soft.
A damaged rotor may also need replacement. Do not continue riding with a severely bent or cracked rotor.
You should seek professional help when:
- The brake lever pulls unusually close to the handlebar.
- Hydraulic fluid appears around the brake system.
- The rotor has serious damage.
- Brake components remain loose after adjustment.
- Braking power remains poor after cleaning.
- You cannot identify the cause of the noise.
The National Highway Traffic Safety Administration recommends checking bicycle equipment and maintaining bicycles properly.
When in doubt, choose safety over experimentation. A professional bike mechanic can identify problems that are difficult to see.
Remember that brakes are not a good place to take unnecessary risks. A small repair today can prevent a dangerous situation tomorrow.
Final Thoughts on Fixing Bike Brake Squeal
Learning how to fix bike brake squeal can save you time and improve your riding experience. More importantly, it can help you discover brake problems before they become serious.
Start with the basics. Clean the braking surfaces and inspect the pads. Then check alignment, hardware, and component condition.
For rim brakes, pad alignment often plays an important role. Slight toe-in can reduce unwanted vibration.
For disc brakes, contamination deserves special attention. Clean the rotor and inspect the pads carefully. Replace contaminated pads when cleaning cannot restore them. For a step-by-step guide, see how to adjust your bike brakes.
New disc pads may also need proper bedding. Follow your brake manufacturer’s recommended procedure for the best results.
However, do not ignore serious warning signs. Weak braking, damaged parts, fluid leaks, or persistent problems require professional attention.
A quiet brake is pleasant, but reliable braking matters more. Never sacrifice braking performance simply to eliminate a noise.
Have you fixed squealing brakes on your bicycle? Share what worked for you in the comments. If this guide helped, share it with another cyclist who may need it.
FAQs
Why do my bike brakes squeal when I stop?
Brake squeal usually comes from vibration between braking surfaces. Dirt, contamination, poor alignment, and worn pads can cause it.
Can I use WD-40 to stop bike brake squeal?
No. Do not apply WD-40 or similar lubricants to brake pads, rotors, or rims. These products can reduce braking performance.
How do I stop disc brakes from squealing?
Clean the rotor and inspect the pads for contamination. Replace contaminated pads and check the caliper and rotor alignment.
Does brake pad bedding reduce squeal?
It can. Proper bedding helps create an even contact surface. However, it cannot fix contaminated or damaged components.
Should I replace squealing brake pads?
Not always. Cleaning or adjustment may solve the problem. Replace pads when they are worn, damaged, or contaminated beyond recovery.