
There are many reasons why a strike plate might fail. Maybe it was cracked when you installed it, or maybe an object fell on it and broke it. Whatever the reason, this simple repair will help you save money by avoiding a trip to the hardware store. This content is presented by https://accurehome.com/
How to repair wood behind strike plate?
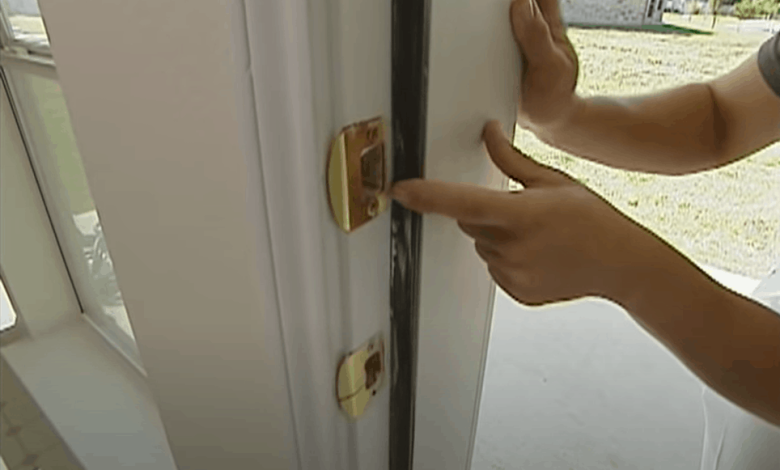
The first step is to remove the strike plate and wood behind it. Using a putty knife, pry out the strike plate from both sides of your door. Use a hammer and nail set to remove any remaining pieces of old wood that may be left behind.
Next, clean up the hole in which you will place your new strike plate by removing any leftover glue or other debris with sandpaper or steel wool. Then apply wood glue evenly over both sides of each piece of wood and replace them into their respective places in the door frame before holding them tight for 30 seconds or so until they are firmly secured once again. Finally, install your new strike plate on top of these two pieces with screws so no further damage can be done while being used as an entryway by others at home! See more: How to move out of a toxic home
Putty knife and hammer
To remove the old strike plate, use a putty knife to pry it from the door frame. Then, use a hammer to knock them out. A nail set can also be used if you need more leverage.
Once you have removed the old strike plate, use a flat-head screwdriver to pry up any nails that are still stuck in place.
Nail set
A nail set is a small tool with a pointed tip that’s used to drive nails all the way down into wood. It’s perfect for fixing small holes, or countersinking and rebating the head of large screws.
A regular hammer can damage your strike plate, so using one could make it harder to replace if you need to fix it again in the future.
New strike plate
You can buy a new strike plate at your local hardware store. The best way to ensure that you get the right size is to measure your door frame, and then bring the measurements with you when shopping for a new strike plate. The strike plate should slide into place without any modification or adjustment, but if it doesn’t fit correctly, you may need to sand down some of its edges so that it fits properly into the frame of your door.
Wood glue
Now that you have the strike plate and screws, it’s time to apply the glue. Apply a small amount of wood glue to the back of the strike plate. A toothpick works well for this task, but if you don’t have one around, just use something small and pointy like a pen or pencil. If you do not apply enough glue to make contact with both pieces of wood, then your repair will not hold up over time (or even last through one storm).
Don’t let any excess glue dry before applying either piece—make sure everything gets glued down in one go!
Toothpick
A toothpick can be used to apply glue to the strike plate, which will then hold the wood in place. It can also be used to apply glue directly behind it, though this is not necessary if you are using nails as well.
The toothpick is placed against both sides of the strike plate and then pushed into place as needed.
Flat-head screwdriver
You’ll need a flat-head screwdriver to remove the strike plate. First, pry up the strike plate with your flat-head screwdriver. Then, grab hold of it and pull it off. When you do this, take care not to damage or dislodge any of the nails; they will be useful later on in reattaching your strike plate—and if you don’t have any extras lying around, then you’ll have to replace them all!
Conclusion
We hope that this article has given you some insight into how to repair wood behind a strike plate. If you’re looking for more information, check out our other articles on home improvement topics such as plumbing and electrical work.