
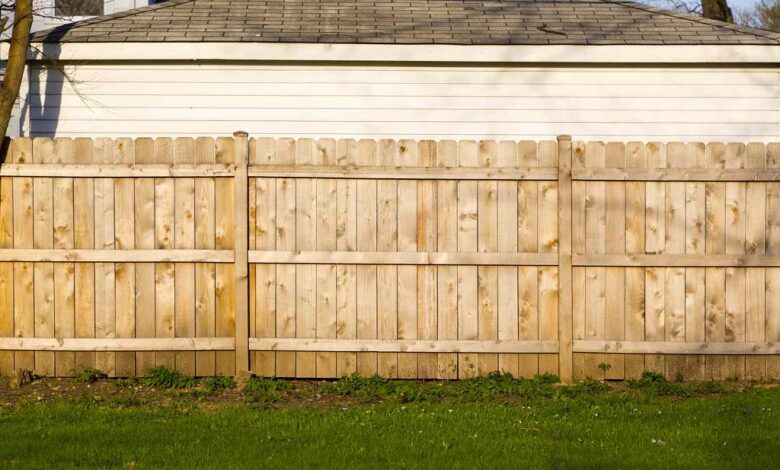
To build a wood fence, plan your fence, measure and lay out the posts, dig holes, position posts in concrete, attach rails or panels to posts, attach pickets to rails, attach post caps, and stain or treat the wood. Building a wood fence can be a cost-effective way to enhance privacy and security on your property while adding aesthetic appeal.
DIY fencing allows you to customize the design and save on labor costs, making it a popular choice for many homeowners. Following a few simple steps, you can create a sturdy and attractive wood fence that complements your outdoor space and meets your needs.
Whether you’re looking to define boundaries, keep pets secure, or enhance your property’s curb appeal, building a wood fence is a practical and rewarding DIY project.
Step 1: Planning And Preparation
Before building a wood fence, planning and preparing for the project is crucial. By completing this initial step, you can ensure a successful and efficient construction process. Here are the essential tasks to focus on during the planning and preparation phase:
Check Local Codes And Regulations
Before proceeding with your wood fence project, you must check with your local authorities regarding any specific codes and regulations that govern fence installation in your area. Understanding these requirements will prevent future issues and ensure your fence complies with the necessary standards.
Measure And Lay Out The Fence Posts
Accurately measuring and marking the locations for the fence posts is a crucial step in the planning process to ensure that the fence will be appropriately aligned and structurally sound. Using the right tools and techniques, carefully lay out the positions for the posts. For additional guidance on this process and to ensure the best practices are followed, visiting https://www.lsdaynursery.com/ can provide valuable insights and tips. This ensures that your fence not only meets your aesthetic and functional needs but also adheres to the highest standards of construction and durability.
Determine The Spacing Of The Posts
Deciding on the spacing between the fence posts is an important consideration that directly impacts the fence’s overall stability and aesthetics. Carefully assessing the terrain and other environmental factors will help determine the ideal distance between the posts for your specific project.
Obtain Necessary Permits
Before commencing your wood fence construction, obtaining any required permits from the local authorities is essential. Ensuring compliance with permit regulations will prevent delays or complications during construction, allowing for smooth and hassle-free project completion.
Step 2: Digging Post Holes
One crucial step in building a wood fence is digging post holes. This step is essential for the stability and longevity of the wall. In the following sections, we will delve into digging post holes, from marking their locations to ensuring they are level and of the appropriate depth.
Mark The Locations Of The Post Holes
Before digging, it’s necessary to mark the locations where the post holes will be, especially if you’re planning to incorporate a removable fence post in your design. Using measuring tape and spray paint, carefully mark the spots for each post hole along the fence line. Ensure the spacing between the holes is consistent for a uniform appearance once the fence is complete. Taking extra care to ensure the markings are accurate is crucial to avoid any irregularities in the fence’s alignment, which is particularly important when installing sections with removable fence posts for ease of maintenance or access.
Dig The Post Holes To The Appropriate Depth
When digging the post holes, it is crucial to ensure they are of the appropriate depth. Use a post-hole digger or an auger to excavate the soil, aiming for a depth that allows for adequate stability. Typically, for a wood fence, the holes should be at least one-third of the length of the post. This depth provides a solid foundation for the posts, ensuring they can support the weight of the fence and withstand environmental factors over time.
Ensure The Post Holes Are Level
Once the post holes are dug, it’s essential to ensure they are level. Use a spirit level to check the vertical alignment of each hole, making adjustments as necessary to achieve a consistent level for all the holes. Properly aligned post holes are essential for the overall stability and aesthetics of the fence, so meticulous attention to this detail is imperative.
Step 3: Installing Fence Posts
Once you have determined the layout and marked the boundaries for your wood fence, it’s time to move on to the next step: installing the fence posts. Properly setting and securing the posts is crucial for the stability and durability of your wood fence. Follow these steps to ensure a strong foundation for your fence:
Set The Posts In Concrete
The first step in installing fence posts is digging holes along the fence line regularly. The depth and diameter of the holes will depend on the height and size of your fence. Generally, the holes should be at least one-third the height of the wall and more comprehensive than the post itself.
Mix the concrete once the holes are dug according to the manufacturer’s instructions. Pour the concrete into the holes, leaving enough space at the top for soil and grass to cover.
Now, it’s time to place the posts in the holes. Position each post in the center of the hole, ensuring it is level and plumb. Use a level to check for accuracy. Hold the post in place while the concrete sets, typically overnight. Once the concrete is dry and the post is secure, move on to the next step.
Attach Rails Or Panels To The Posts
After the posts are concrete and firmly in place, it’s time to attach the rails or panels to them. This step will depend on your wood fence’s specific design and style. Whether using individual rails or pre-built panels, the process remains the same.
Position the first rail or panel against the posts starting at one end of the fence line. Make sure it is level and aligned with the top of the posts. If installing multiple rails, use a measuring tape to ensure consistent spacing.
Once the first rail or panel is attached, continue attaching the remaining rails or panels, ensuring each one is securely fastened to the posts.
Secure Each Rail And Panel
Now that the rails or panels are attached to the posts, securing them properly is crucial to ensure a sturdy and long-lasting wood fence. This step may vary depending on the specific materials you’re using, but some standard methods include:
- Using screws or nails to attach the rails or panels to the posts
- Using brackets or brackets with screws for added support
- Using adhesive or construction glue for extra stability
Whichever method you choose, follow the manufacturer’s instructions and recommendations for the best results.
By following these steps to install fence posts, you’ll be well on your way to building a strong and beautiful wood fence that will add privacy and enhance the aesthetic appeal of your property.
Step 4: Attaching Fence Pickets
Now that you have measured and cut the fence pickets to size, it’s time to attach them to the rails. This step is crucial as it determines your wood fence’s overall appearance and structural integrity. With proper installation, your fence will enhance the aesthetic appeal of your property and provide the privacy and security you desire.
Measure And Cut The Fence Pickets To Size
Before attaching the fence pickets, it’s essential to ensure they are cut to the correct size. Measure the height of the posts and add a few inches to account for the gap between the ground and the bottom of the fence. Use a saw or a suitable cutting tool to trim the pickets to the desired length. Be careful to make precise cuts to maintain a uniform appearance.
Attach The Fence Pickets To The Rails
Once the pickets are cut to size, you can start attaching them to the rails. Position each picket vertically and place them evenly along the length of the fence. Use galvanized nails or screws to secure the pickets to the rails. Attaching at least two fasteners per picket is recommended, ensuring they are evenly spaced and securely fastened. Take your time to provide a stable connection that will withstand weather conditions and the test of time.
Ensure The Fence Pickets Are Level And Aligned
As you attach the fence pickets, it’s essential to ensure they are level and aligned. Use a level to check the vertical alignment of each picket. Adjust as needed to maintain a straight and visually appealing fence. Additionally, check the pickets’ horizontal alignment to ensure they are evenly spaced and create a consistent look. Pay attention to detail during this step to achieve a professional finish.
By following these steps, you can confidently attach the fence pickets, knowing that your wood fence will stand firm and enhance the beauty of your property. Pay attention to details; proper installation is critical to a durable and visually pleasing wall.
Step 5: Finishing And Maintenance
To finish and maintain your wood fence, follow these steps: attach decorative hooks, add fence pickets, cut excess height, connect posts to rails, level and straighten posts, and space the posts accurately. By following these guidelines, you can ensure the longevity and durability of your wood fence.
Once you have completed the previous steps for your wooden fence, it’s time to focus on the finishing touches and ongoing maintenance. This step is crucial to ensuring your fence’s long-lasting durability and aesthetic appeal.
Stain Or Treat The Wood For Protection
To protect your wood fence from the elements and enhance its natural beauty, it is essential to stain or treat the wood. Applying a high-quality wood stain or sealant creates a protective barrier that prevents water damage, rot, and other forms of deterioration. Moreover, it helps to prevent the wood from fading or discoloration caused by exposure to the sun’s harmful UV rays.
When choosing a stain or treatment, consider both its protective qualities and its ability to enhance the appearance of the wood. Opt for a stain that complements your outdoor aesthetic and is specifically formulated for use on fences. Apply the paint according to the manufacturer’s instructions, ensuring even coverage and taking care to reach all sides of the fence panels and posts.
Install Post Caps
Adding post caps to your wood fence elevates its visual appeal and provides an extra layer of protection. Post caps are the crowning glory of a wall, protecting the vulnerable end grains of the posts from moisture and potential damage. They come in various styles and materials, allowing you to choose one that complements your fence design. Installing postcaps is a straightforward process. Place the cap on top of the post and secure it using an exterior-grade adhesive or by nailing it. Ensure that the cap is aligned correctly and sits securely on the post.
Regularly Inspect And Maintain The Fence

To maintain the longevity and functionality of your wood fence, it is essential to perform regular inspections and routine maintenance. Regularly inspecting your fence allows you to identify any issues or signs of damage early on and take prompt corrective action. Inspect the fence for loose or damaged boards, posts, rails, and any signs of pest infestation.
Replace any damaged components promptly to prevent further deterioration. Additionally, check for any signs of water or moisture damage, such as mold or rot. If you notice any of these signs, address the issue promptly to prevent further damage. General maintenance typically includes cleaning the fence periodically to remove dirt, debris, and mold.
A mixture of mild detergent and water can scrub the fence gently. Rinse thoroughly with water and let it dry completely before applying any stain or treatment. By following these maintenance practices, you can ensure the longevity and appearance of your wood fence for years to come. Regular maintenance not only prevents costly repairs but also keeps your fence looking its best, enhancing your property’s overall beauty and value.
Frequently Asked Questions Of How To Build A Wood Fence
Is It Cheaper To Build Your Fence?
Installing a fence yourself is usually cheaper, as you won’t have to pay labor costs. This is one of the main reasons people opt for a DIY approach.
How To Build A Fence Step By Step?
To build a fence step by step, start planning your design and getting a permit. Measure and dig post holes, then position posts in concrete. Attach rails or panels, add pickets, and top with post caps. Finally, stain or treat the wood for longevity.
What’s The Cheapest Way To Build A Wood Fence?
The cheapest way to build a wood fence is by doing it yourself. You don’t have to pay for labor costs, which makes it more affordable.
How Far Apart Should Fence Posts Be?
Fence posts should be spaced approximately 8 feet apart.
Conclusion
Building a wood fence can be a rewarding and cost-effective DIY project. By following the step-by-step instructions and utilizing the right tools and materials, you can create a beautiful and functional fence for your property. Building your fence saves you money on labor costs and allows you to customize the design to fit your specific needs; similarly, learning how to install a door frame empowers you to enhance your home with a personalized touch and cost-effective craftsmanship.
Remember to check local codes and regulations, measure and lay out the fence properly, and secure the posts and rails correctly. With some patience and effort, you can enjoy the satisfaction of a job well done and a fence that enhances your outdoor space.