

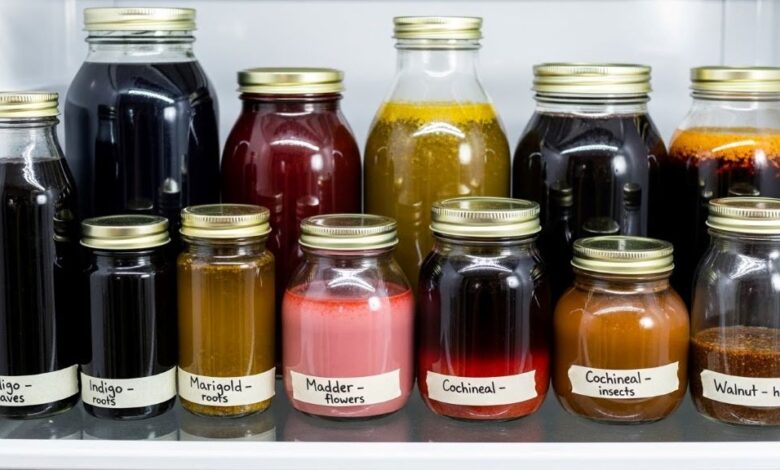
Natural dyeing has become increasingly popular among craft enthusiasts and sustainability advocates. If you’re exploring eco-conscious textile art, preserving your dye baths can save money and reduce waste. Gett In Cool offers valuable insights into sustainable fashion practices that align perfectly with natural dyeing techniques. This guide will walk you through simple preservation methods that work beautifully for beginners.
Many crafters wonder about extending the life of their natural dyes. The good news is that proper preservation techniques can keep your dye baths usable for weeks or even months. Learning how to make natural cloth dye at home is just the first step. Additionally, understanding preservation methods ensures you get maximum value from your natural materials while minimizing environmental impact.
Understanding Natural Dye Bath Basics
Natural dyes come from plants, minerals, and other organic sources. However, these materials can spoil or lose potency without proper care. Unlike synthetic dyes, natural dye baths contain organic matter that attracts bacteria and mold. Therefore, preservation becomes essential for anyone serious about eco-friendly dyeing.
The lifespan of your dye bath depends on several factors. Temperature, storage conditions, and the type of natural material used all play important roles. For instance, indigo dye baths require different care than those made from avocado pits or onion skins.
Essential Preservation Methods
Refrigeration Techniques
Cold storage is your best friend when preserving dye baths. Simply strain out solid plant materials after dyeing. Then, transfer the liquid to clean glass jars with tight-fitting lids. Store these containers in your refrigerator at temperatures below 40°F.
Most dye baths stay fresh for two to four weeks when refrigerated properly. However, always check for signs of spoilage before reusing. A sour smell or visible mold indicates the bath has gone bad.
Freezing for Long-Term Storage
Freezing extends preservation even further. Pour strained dye liquid into freezer-safe containers, leaving some space for expansion. Ice cube trays work wonderfully for smaller batches. Moreover, this method allows you to thaw only what you need.
Frozen dye baths maintain their color properties for up to six months. Label each container with the dye source and date. This practice helps you track which batches need using first.
pH Adjustment Methods
Maintaining proper pH levels prevents bacterial growth naturally. Adding a small amount of vinegar lowers pH, creating an inhospitable environment for microorganisms. Conversely, some dye baths benefit from alkaline conditions achieved through washing soda additions.
Test your dye bath’s pH using simple test strips. Most natural dyes preserve best between pH 4 and 6. Furthermore, pH adjustments can actually enhance certain colors during subsequent dyeing sessions.
Preventing Contamination
Cleanliness matters tremendously in dye bath preservation. Always use sanitized containers and utensils when handling your dyes. Additionally, avoid introducing tap water containing chlorine or other chemicals that encourage bacterial growth.
Distilled or filtered water works best for topping off dye baths. Many experienced dyers recommend straining liquids through cheesecloth or coffee filters. This removes plant particles that decompose quickly and spoil the entire batch.
Reactivating Stored Dye Baths
Bringing preserved dye baths back to working condition requires gentle heating. Pour the stored liquid into a non-reactive pot and warm it slowly. However, avoid boiling, which can alter color properties significantly.
Smell the dye bath before using it on precious fabric. A fresh, earthy scent indicates good condition. Conversely, any foul odors mean the batch should be composted rather than used.
Some color strength naturally fades during storage. Therefore, you might need longer dyeing times or additional dye material. Testing on scrap fabric helps determine if your preserved bath still produces satisfactory results.
Common Mistakes to Avoid
Beginners often make several preservation errors that shorten dye bath life. Never store dye baths in metal containers, which can react with natural pigments. Plastic containers work acceptably, though glass remains the gold standard.
Another frequent mistake involves leaving plant materials in the dye liquid. These organic bits decompose rapidly and contaminate the entire batch. Similarly, improper sealing allows air exposure that promotes mold growth.
Temperature fluctuations also damage preserved dye baths. Keep stored containers away from heat sources and direct sunlight. Consistent cool temperatures preserve color intensity and prevent spoilage effectively.

Sustainable Disposal Practices
Eventually, all dye baths reach the end of their useful life. Fortunately, natural dye liquids can return safely to the environment. Pour exhausted baths onto compost piles or use them as plant fertilizer in your garden.
Some municipalities allow natural dye water disposal through regular drains. However, check local regulations first. According to the Environmental Protection Agency, proper disposal of craft materials protects water quality and ecosystems.
Never pour synthetic chemical additives mixed with natural dyes down drains. These combinations may harm aquatic life despite the natural dye components being biodegradable.
Maximizing Dye Bath Value
Smart preservation strategies stretch your natural dyeing budget considerably. One dye bath typically produces multiple color variations through successive dippings. Lighter shades emerge first, followed by progressively deeper tones.
Keep detailed notes about each preserved batch. Record the original plant material, creation date, and previous uses. This documentation helps you predict color outcomes and plan future projects efficiently.
Consider combining preservation with color experimentation. Stored dye baths offer opportunities to test different mordants and modifiers. These experiments expand your color palette without creating entirely new batches.
Seasonal Considerations
Natural dye availability changes with seasons, making preservation especially valuable. Summer’s abundance of fresh plant materials creates opportunities for building your dye bath library. Preserve multiple batches during peak growing seasons for year-round use.
Winter dyeing relies heavily on preserved or dried materials. Properly stored dye baths let you continue creating beautiful textiles even when fresh plants are unavailable. Therefore, develop preservation habits during warmer months to support cold-weather projects.
Building Your Preservation Toolkit
Several inexpensive items make dye bath preservation easier and more effective. Invest in quality glass jars with airtight seals in various sizes. Additionally, labels and permanent markers help track your growing collection.
A kitchen thermometer ensures safe storage temperatures. Digital models provide precise readings that take guessing out of the equation. Furthermore, pH test strips cost very little but offer valuable information about dye bath conditions.
Small funnels prevent spills when transferring liquids between containers. Cheesecloth packages last through numerous straining sessions. These simple tools make preservation routines quick and hassle-free.
Conclusion
Preserving natural dye baths combines practical economy with environmental responsibility. Refrigeration, freezing, and pH management extend the useful life of these precious liquids significantly. However, success requires attention to cleanliness, proper storage conditions, and careful monitoring for spoilage signs.
Beginners can master these techniques quickly with consistent practice. Start with small batches to build confidence before scaling up your preservation efforts. Moreover, detailed record-keeping helps refine your methods over time.
Sustainable textile crafts depend on efficient resource use. By preserving dye baths effectively, you reduce waste while maintaining a ready supply of beautiful natural colors. These eco-friendly practices align perfectly with the values driving interest in natural dyeing today.
Frequently Asked Questions
How long can I store a natural dye bath in the refrigerator?
Most natural dye baths remain usable for two to four weeks when refrigerated properly. Always strain out solid plant materials first and store the liquid in clean, airtight glass containers. Check for signs of spoilage like mold or sour odors before reusing any preserved bath.
Can I freeze all types of natural dyes?
Yes, freezing works well for most natural dye types and extends preservation up to six months. However, indigo dye baths require special handling because freezing can disrupt the fermentation process. Standard plant-based dyes from materials like avocado, onion skins, and berries freeze beautifully.
What containers work best for storing dye baths?
Glass containers with tight-fitting lids provide the safest storage option for natural dye baths. Avoid metal containers that can react with natural pigments and alter colors. Food-grade plastic works acceptably for short-term storage, though glass remains superior for maintaining color quality.
How do I know if my preserved dye bath has gone bad?
Trust your senses when evaluating preserved dye baths. Fresh, earthy scents indicate good condition, while sour or rotten smells mean the batch should be discarded. Additionally, visible mold growth, unusual color changes, or slimy texture all signal spoilage.
Does preservation affect the color strength of natural dyes?
Some color fading naturally occurs during storage, especially with longer preservation periods. Properly stored dye baths typically maintain 70-90% of their original color intensity. You may need slightly longer dyeing times or additional dye material when working with preserved baths compared to fresh ones.
Related Topics:
How to Use BioAdvanced Rose and Flower Care Effectively
7 Bad Things About Spas That Might Surprise You