
A coffee station does not require a dedicated counter, a plumbed-in machine, or a grinder that costs more than your phone. Most people who build one spend far less than they expect, and the difference between a setup that feels good and one that turns into clutter usually comes down to organization rather than money. The upgrades people assume are expensive — frothed milk, a tidy tray, a repeatable pour — mostly are not. If frothed milk is on your wish list, before you assume a frother is out of reach. Below is a realistic budget breakdown, the gear that earns its space, and the purchases worth skipping entirely.
Quick Answer
Build your coffee station around what you already own, then add one upgrade at a time. A functional setup — coffee maker, mugs, storage, and a small tray or mat — can be assembled for roughly $25 to $75 if you shop secondhand and skip decorative extras. The two purchases that genuinely improve taste are fresh beans and a burr grinder, so fund those before buying syrups, gadgets, or matching accessories.
Key Takeaways
- Start with the drink you actually make most days; gear for a drink you order twice a month is wasted money.
- A burr grinder and fresh beans deliver more flavor improvement per dollar than any other upgrade.
- Handheld milk frothers are among the cheapest ways to add café-style drinks, but they froth differently than a steam wand.
- Vertical storage, a protective tray, and proximity to an outlet matter more than the size of your counter.
- Buying a complete “coffee bar kit” before you know your habits is the most common way people overspend.
What Actually Belongs on a Budget Coffee Station
Divide your station into three categories: essentials, upgrades, and decoration. Essentials keep the station working. Upgrades improve the cup. Decoration only looks good, and it is where budgets quietly disappear.
Essentials: your existing coffee maker or brewing device, mugs, a way to store beans or grounds, and something to catch drips and spills. That is genuinely it. Everything else is optional.
Upgrades worth considering: a burr grinder, a kitchen scale, a gooseneck kettle if you brew pour-over, and a milk frother if you drink lattes or cappuccinos.
Decoration and convenience: matching canisters, syrup bottles, mug hooks, signs, risers, and themed signage. These are fine once the station works, but they should never come first.
Match the Gear to Your Daily Drink
If you drink drip coffee with milk, a $40 grinder and a $15 frother will do more for you than a $200 espresso machine you never learn to use. If you drink espresso-based drinks daily, the calculus changes: a machine with a steam wand becomes the priority, and a handheld frother becomes a backup rather than the main tool. Write down what you drank over the last two weeks before you buy anything.
How Much Should You Expect to Spend?
The ranges below reflect typical US retail pricing for new and secondhand gear. They shift with sales, season, and region, so treat them as planning bands rather than quotes.
| Tier | Typical Total | What It Covers | Best For |
|---|---|---|---|
| Zero-cost refresh | $0–$25 | Reorganizing what you own, thrifted mugs, a tray or mat | Anyone testing whether a station fits their routine |
| Starter | $50–$150 | Entry burr grinder, scale, storage container, handheld frother | Drip and pour-over drinkers who want better flavor |
| Comfortable | $150–$350 | Better grinder, kettle, electric frother or entry espresso machine | Daily latte or espresso drinkers |
Notice what is missing from the top tier: syrups, flavored powders, and accessories. Those are cheap individually and expensive in aggregate, and they rarely change how much you enjoy the station.
Setting It Up: A One-Hour Plan
- Choose the location first. Look for roughly 24 inches of counter near an outlet, away from the stove, oven, and direct sunlight. Heat and light degrade beans quickly, and a station you have to walk across the kitchen to use will stop being used.
- Empty everything onto the counter. Pull out the coffee maker, mugs, beans, filters, and any gadgets you already own. You will likely find you need to buy less than you thought.
- Assign zones. Brewing zone (machine, kettle), prep zone (grinder, scale, beans), and finishing zone (mugs, milk, sugar, spoons). Three small zones keep the station from spreading across the whole counter.
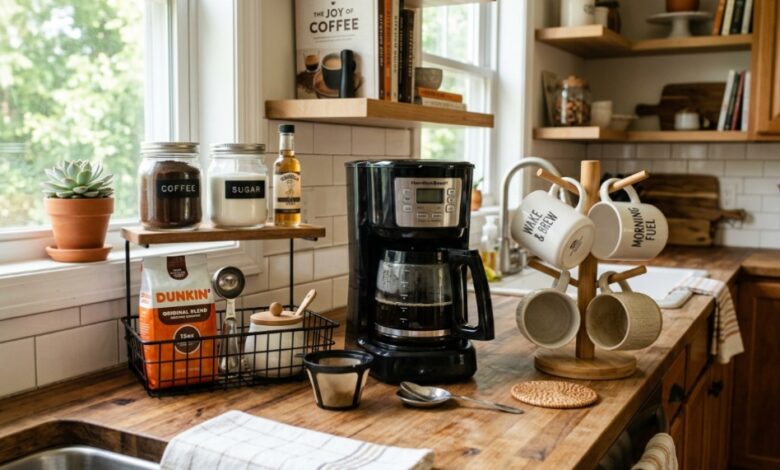
- Go vertical where you can. A small riser, a stackable mug arrangement, or a narrow shelf frees up the flat surface you actually brew on.
- Protect the counter. A tray, mat, or shallow dish catches drips and grounds, and it makes cleanup a single lift-and-wipe instead of a scrub.
- Set a cleaning rhythm. Rinse the frother whisk and pitcher immediately after use, dump the drip tray weekly, and wipe the grinder hopper monthly. This is the step most people skip and the reason stations start looking grimy.
Where to Save Money and Where Not To
Budget building is about allocating, not minimizing. Some items are safe to buy cheap. Others will cost you more over time if you cut corners, If you are looking for ways to keep your setup clean and pest-free, check out our guide on why do fruit flies like coffee grounds
Safe to buy cheap
- Mugs and cups: thrift stores and discount retailers sell perfectly good ceramic for a fraction of boutique prices.
- Trays, mats, and risers: these are functional, not technical. Any material that wipes clean works.
- Storage containers: an airtight jar with a decent seal is enough. You do not need a vacuum-sealed canister.
- Spoons, tamping mats, and cleaning brushes: commodity items with no meaningful performance difference.
Worth spending on
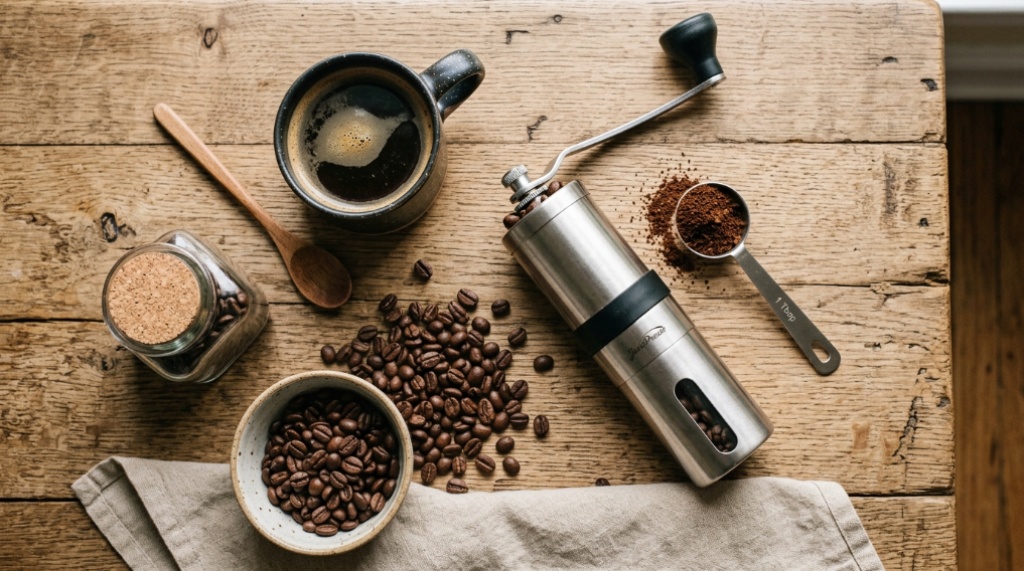
- The grinder. This is the single biggest flavor variable in home coffee. A blade grinder produces uneven particles that extract at different rates, which is why cheap setups often taste simultaneously bitter and sour.
- Fresh beans. Buying whole beans roasted recently beats any equipment upgrade. Check the roast date, not just the best-by date.
- A scale. Weighing coffee and water turns a guessing game into a repeatable recipe, and basic digital scales are inexpensive.
The trade-off is real: a budget burr grinder costs more than a blade grinder and takes up more space. If your counter is tight or your budget is genuinely zero, pre-ground coffee from a local roaster is a reasonable compromise — buy small amounts and use them within a couple of weeks.
Milk Frothing on a Budget
Frothed milk is the upgrade people most often assume they cannot afford, and it is usually the cheapest one to add. There are four common approaches, each with a different texture result and effort level.
| Method | Typical Cost Band | Texture | Notes |
|---|---|---|---|
| Handheld battery frother | Low | Light, airy foam | Fast, small, works with warm milk; not true microfoam |
| Stovetop or manual pump frother | Low to moderate | Dense, thicker foam | More effort, no batteries, good for small volumes |
| Electric countertop frother | Moderate | Consistent, warm foam | Heats and froths in one step; takes up counter space |
| Steam wand on an espresso machine | Highest | Microfoam for latte art | Requires practice and a machine that supports it |
If you drink mostly cappuccinos and hot chocolate, a handheld frother is enough. If you want silky microfoam for latte art, no budget gadget will fully replicate a steam wand — that is a genuine limitation, not a marketing gap.
Common Mistakes That Waste Money
- Buying the kit before the habit. A full accessory set purchased before you know your daily drink often ends up in a cabinet within three months.
- Ignoring the outlet. A beautiful station with no nearby power becomes a display shelf.
- Storing beans in the hopper long-term. Hoppers expose beans to air and light. Keep the bulk of your beans in an airtight container and refill the hopper with what you will use in a few days.
- Buying syrups without a plan. Syrup bottles expire, take up space, and rarely get used at the rate you expect.
- Skipping the drip tray or mat. Small spills are what turn a neat station into a sticky one.
- Chasing a specific aesthetic. Matching everything to a color scheme costs more than buying functional pieces that happen to look fine together.
Small Kitchens, Rentals, and Shared Spaces
If you rent or have limited counter space, prioritize movable and reversible solutions. A rolling cart lets you tuck the station away when you cook and roll it out when you brew. A fold-down shelf or a narrow riser adds usable height without drilling. Adhesive hooks can hold light items like a scoop or a small towel, but check the weight rating — they will not hold a mug collection, and they can damage some finishes when removed.
If you share a kitchen, keep your station self-contained: your own beans, your own grinder, your own cleaning cloth. Shared equipment tends to migrate, and a station that depends on borrowed gear stops working the moment someone else moves it.
Frequently Asked Questions
How much does it cost to set up a home coffee station?
A basic station using gear you already own costs almost nothing beyond a tray and a storage container. Adding a burr grinder, scale, and frother typically lands in the $50 to $150 range. Espresso-focused setups cost more because the machine itself is the main expense.
Do I need a grinder to start?
No. Pre-ground coffee from a roaster will outperform stale whole beans ground in a cheap blade grinder. If you do buy a grinder, a burr grinder is the better long-term choice because it produces a more even grind.
Is a handheld milk frother worth it?
For most casual latte and cappuccino drinkers, yes. It is inexpensive, small, and fast. The trade-off is texture: it creates airy foam rather than the dense microfoam a steam wand produces, so it will not support detailed latte art.
Where should I put a coffee station in a small kitchen?
Pick a spot near an outlet and away from the stove and direct sunlight. If counter space is limited, a rolling cart or a narrow riser works better than claiming a full section of countertop you need for cooking.
Can I build one without drilling into walls?
Yes. Trays, risers, stackable mug storage, and rolling carts require no installation. Adhesive hooks work for lightweight items only, and they may affect some wall finishes when removed.
How do I keep the station from becoming cluttered?
Limit the station to what you use weekly. Move seasonal or occasional items — specialty syrups, spare mugs, backup filters — to a cabinet. A station that only holds daily-use gear stays tidy with almost no effort.
Conclusion
The best budget coffee station is the one built around your actual habits, not a photo you saved. Start with what you own, place it near an outlet and away from heat, and add one upgrade at a time — ideally a grinder or fresher beans before anything decorative. Milk frothing is usually cheaper to add than people expect, so it rarely needs to be the thing you cut. Set a cleaning rhythm early, keep the surface limited to weekly-use items, and the station will stay functional long after the novelty wears off.